Add Zenith to your Thank you and Order status pages
You'll open Shopify's checkout editor and add the Zenith survey block to the two pages customers see after they buy: Thank you and Order status. Placing it on both catches customers who skip the confirmation page and come back later to check their order.
Open Settings
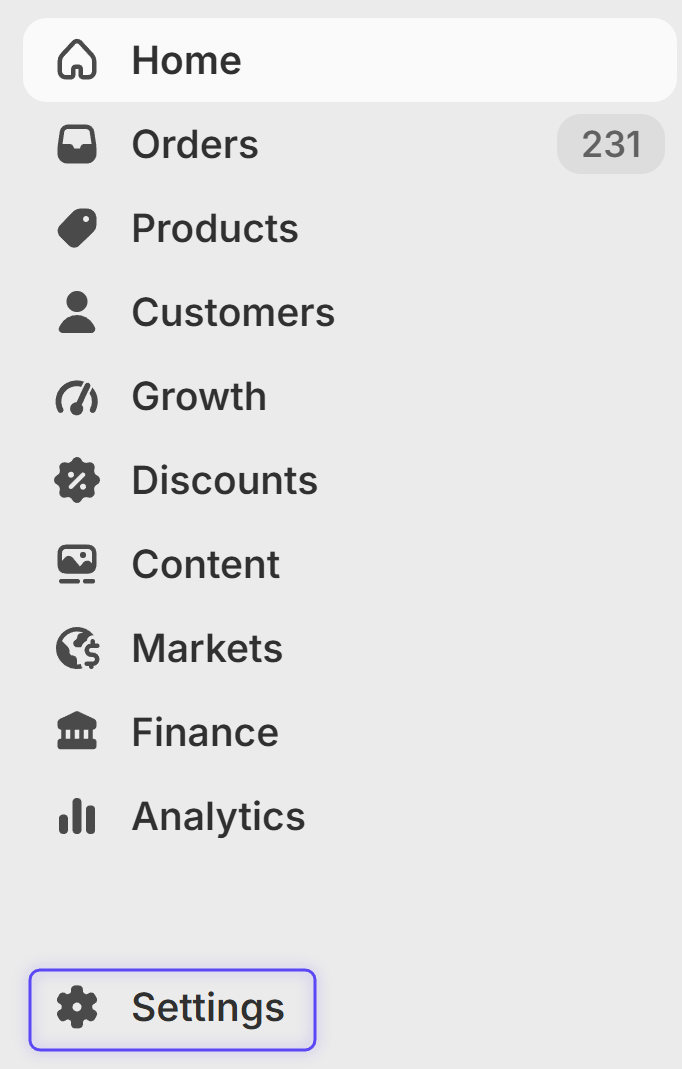
In your Shopify admin, click Settings in the bottom-left corner.
Open the checkout editor
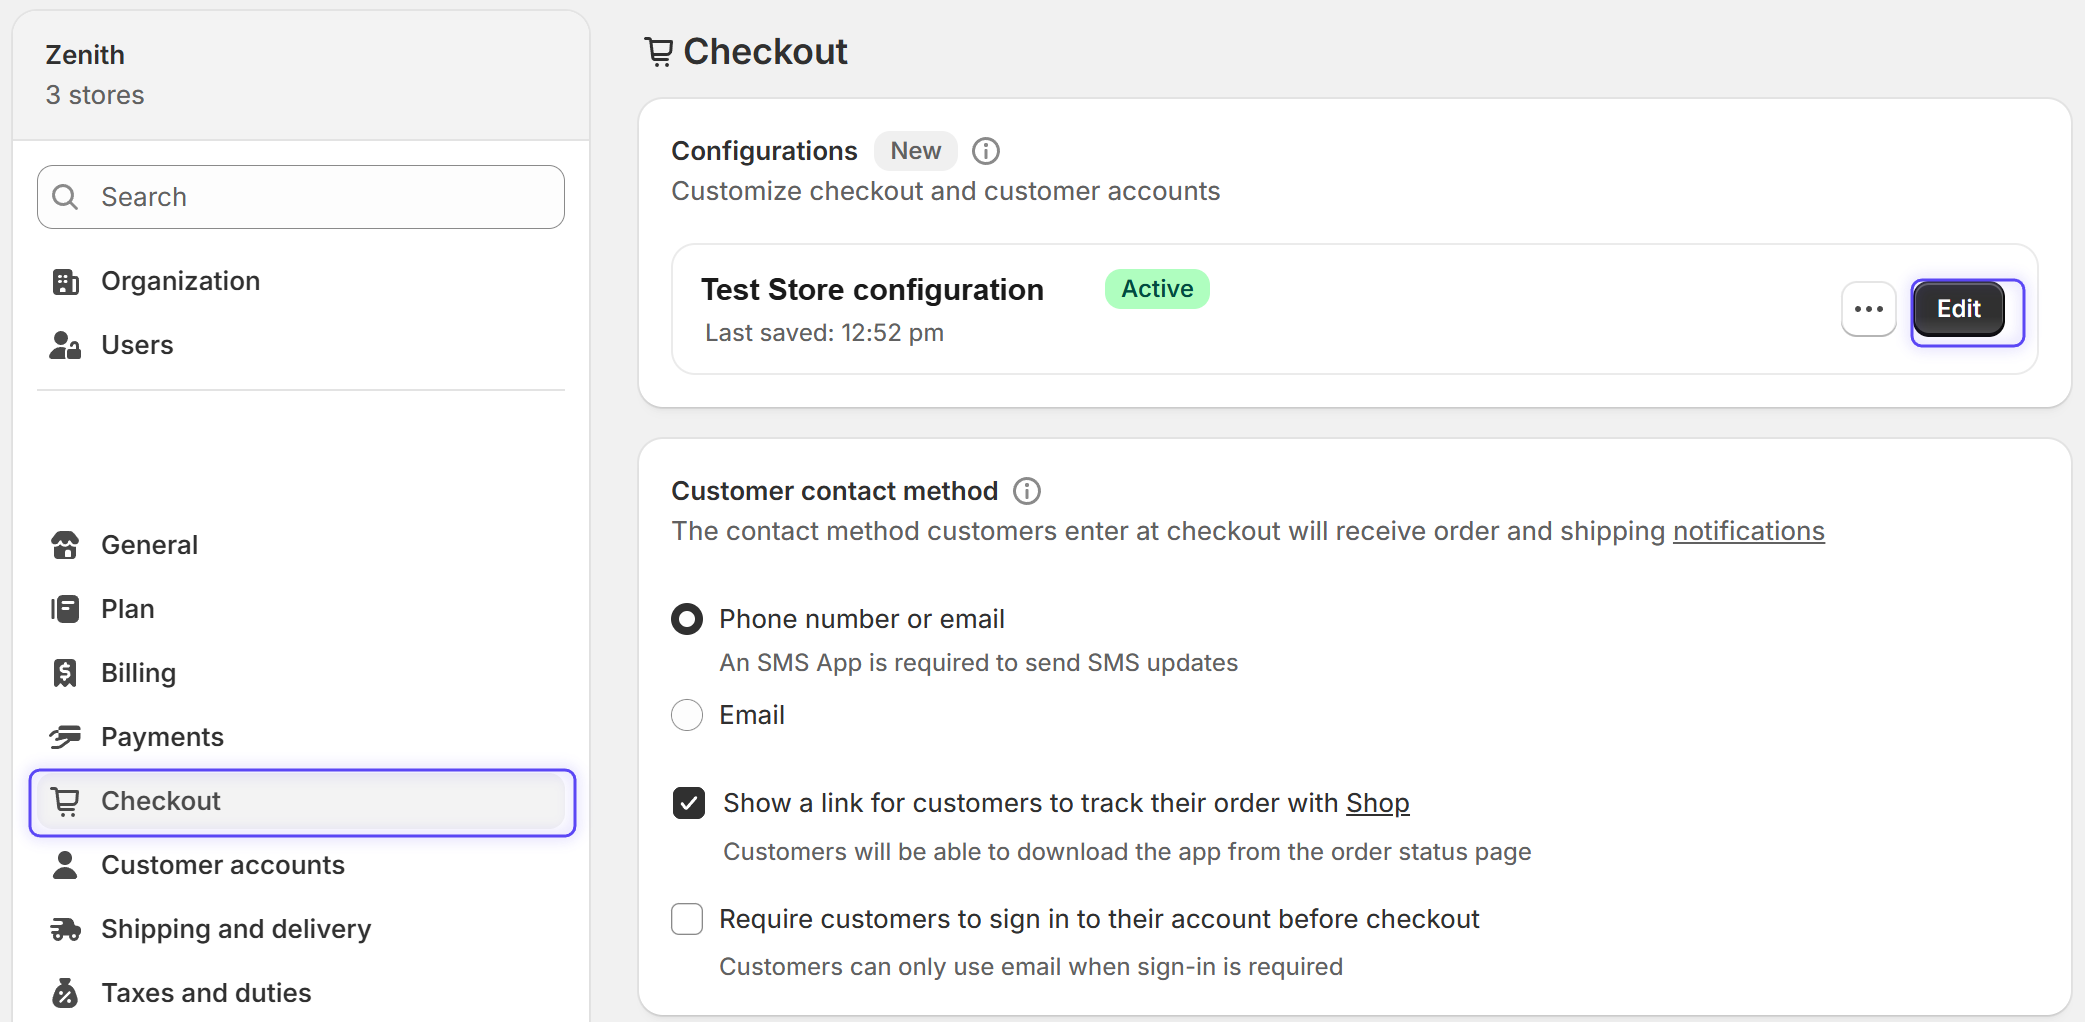
Choose Checkout from the left menu, then click Edit next to your active configuration.
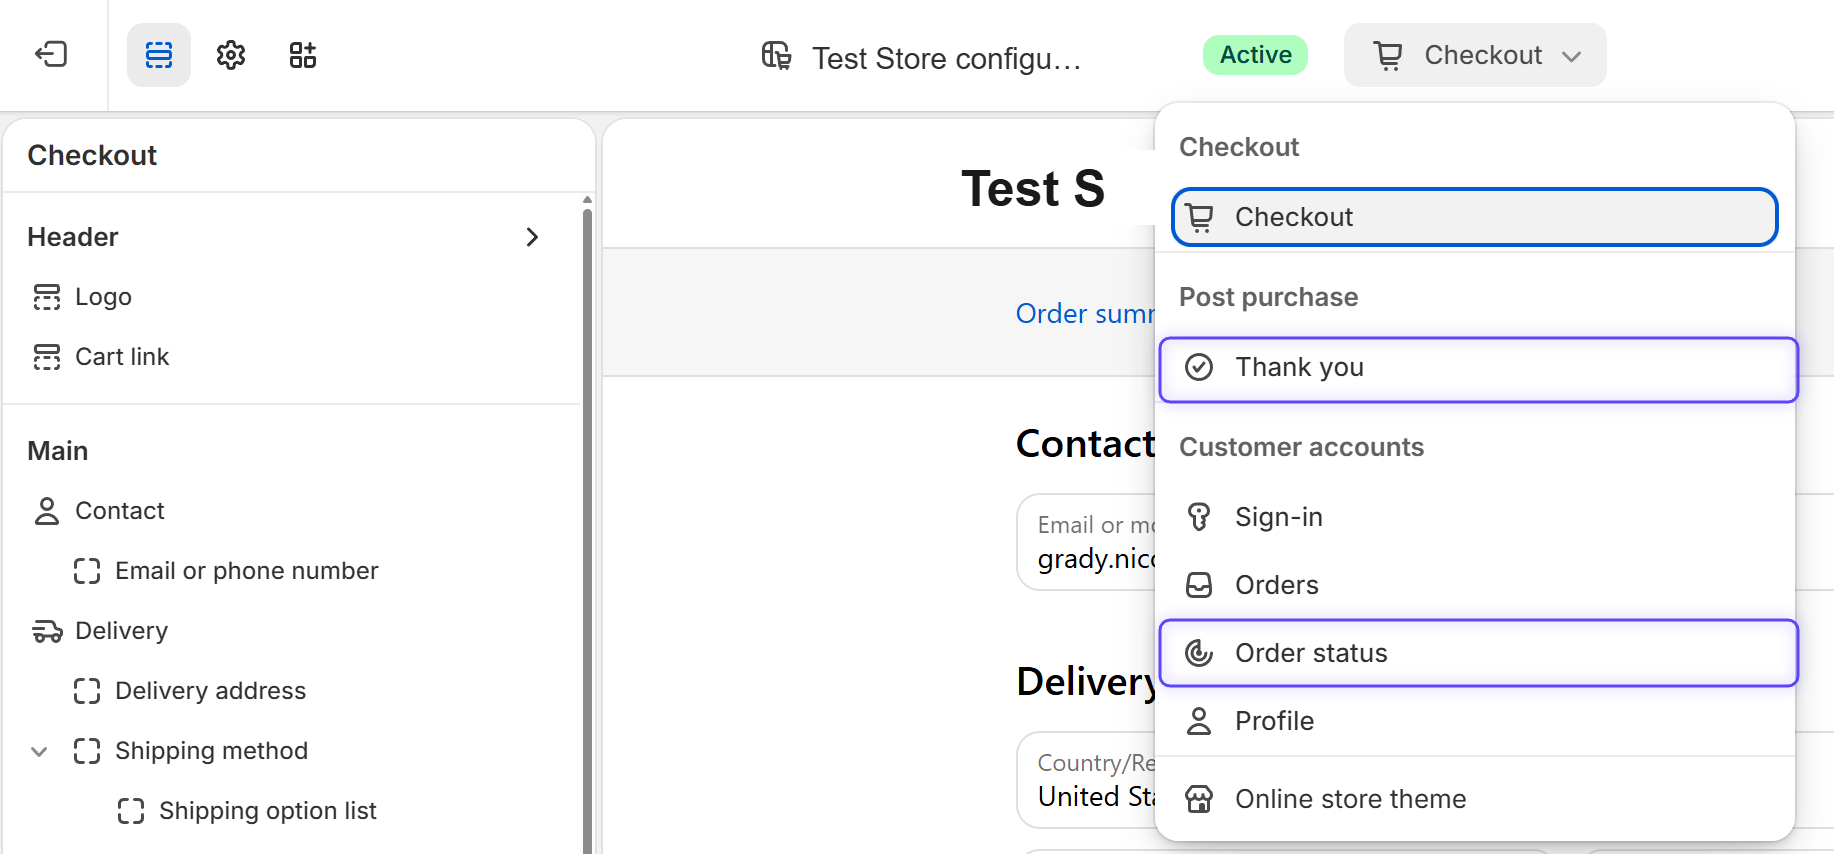
Open the page selector
This menu is where you switch between the two pages. The numbers show which step happens on each: step 4 on Thank you (under Post purchase), step 6 on Order status (under Customer accounts). Choose Thank you now.
Add the Post Purchase Survey block
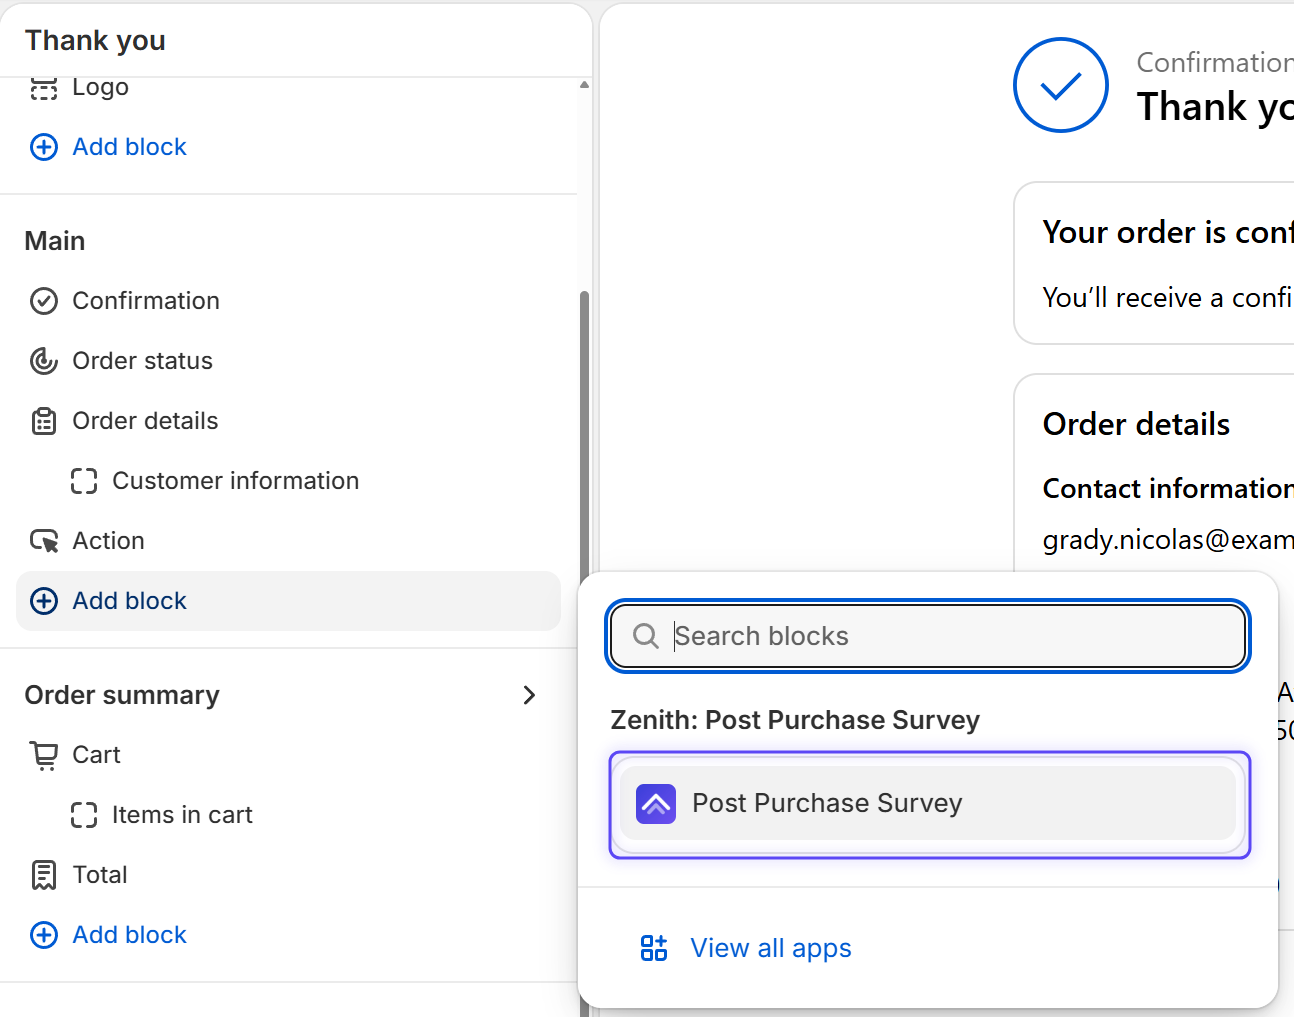
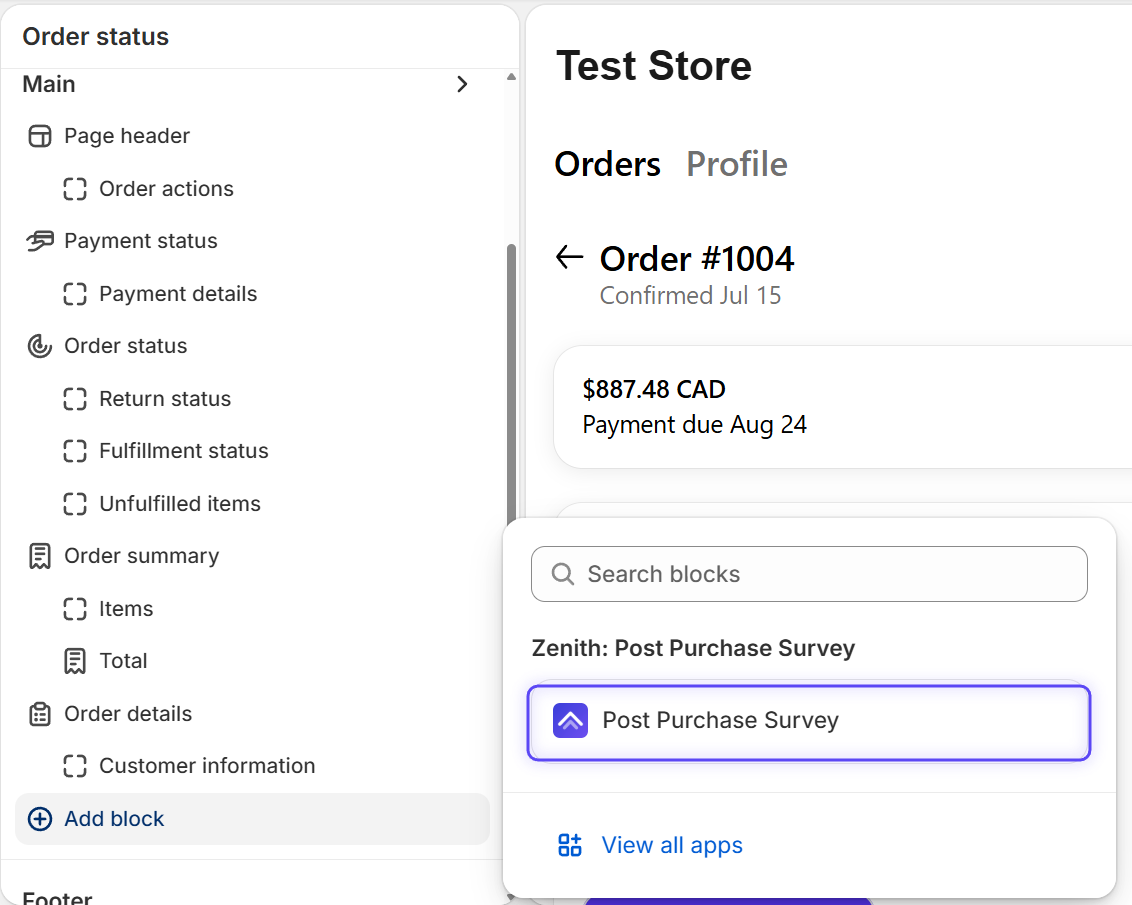
In the Main or Order summary section, click ⊕ Add block, then select Post Purchase Survey.
Save
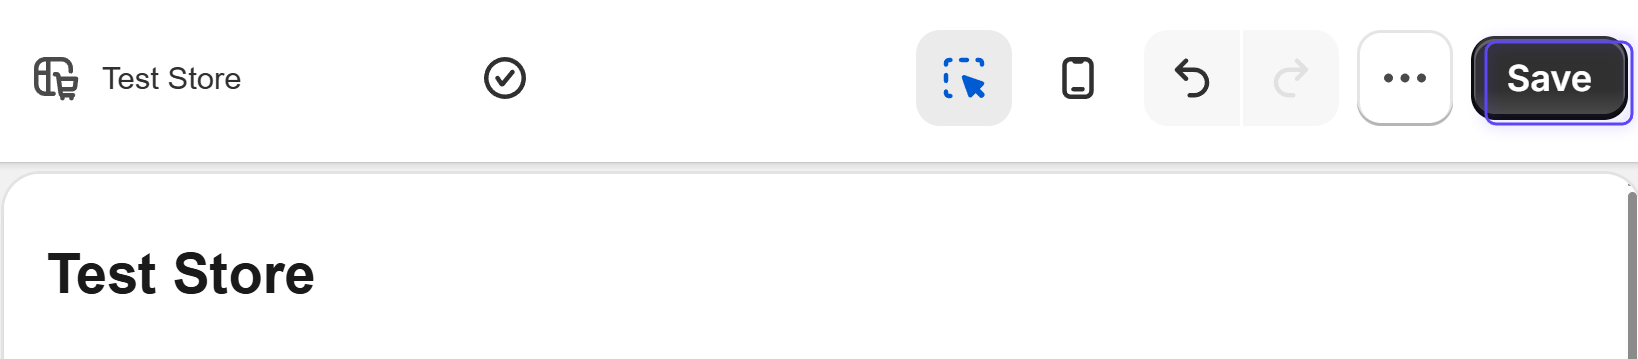
Click Save in the top-right. The survey is now on your Thank you page.
Repeat for the Order status page
Open the page selector again, choose Order status under Customer accounts, and repeat steps 4 and 5.
What happens next
- Activate your survey. Review your three starter questions in Zenith, then toggle the survey active. It stays hidden from customers until you do.
- Place a test order. Buy something on your store, then refund it, to see the survey on your own pages.
- Watch responses come in. Answers appear in your Zenith dashboard, with channel attribution, NPS, and revenue reporting built in.